Team Management
The Team Management feature allows administrators (Admins) to manage the list of members, assign permissions, and invite new users to their organization.
1. Accessing Team Management
To manage your team, follow these steps:
-
Log in to your account.
-
Select Settings in the bottom left corner of the screen.
-
From the left sidebar, select Team Management.
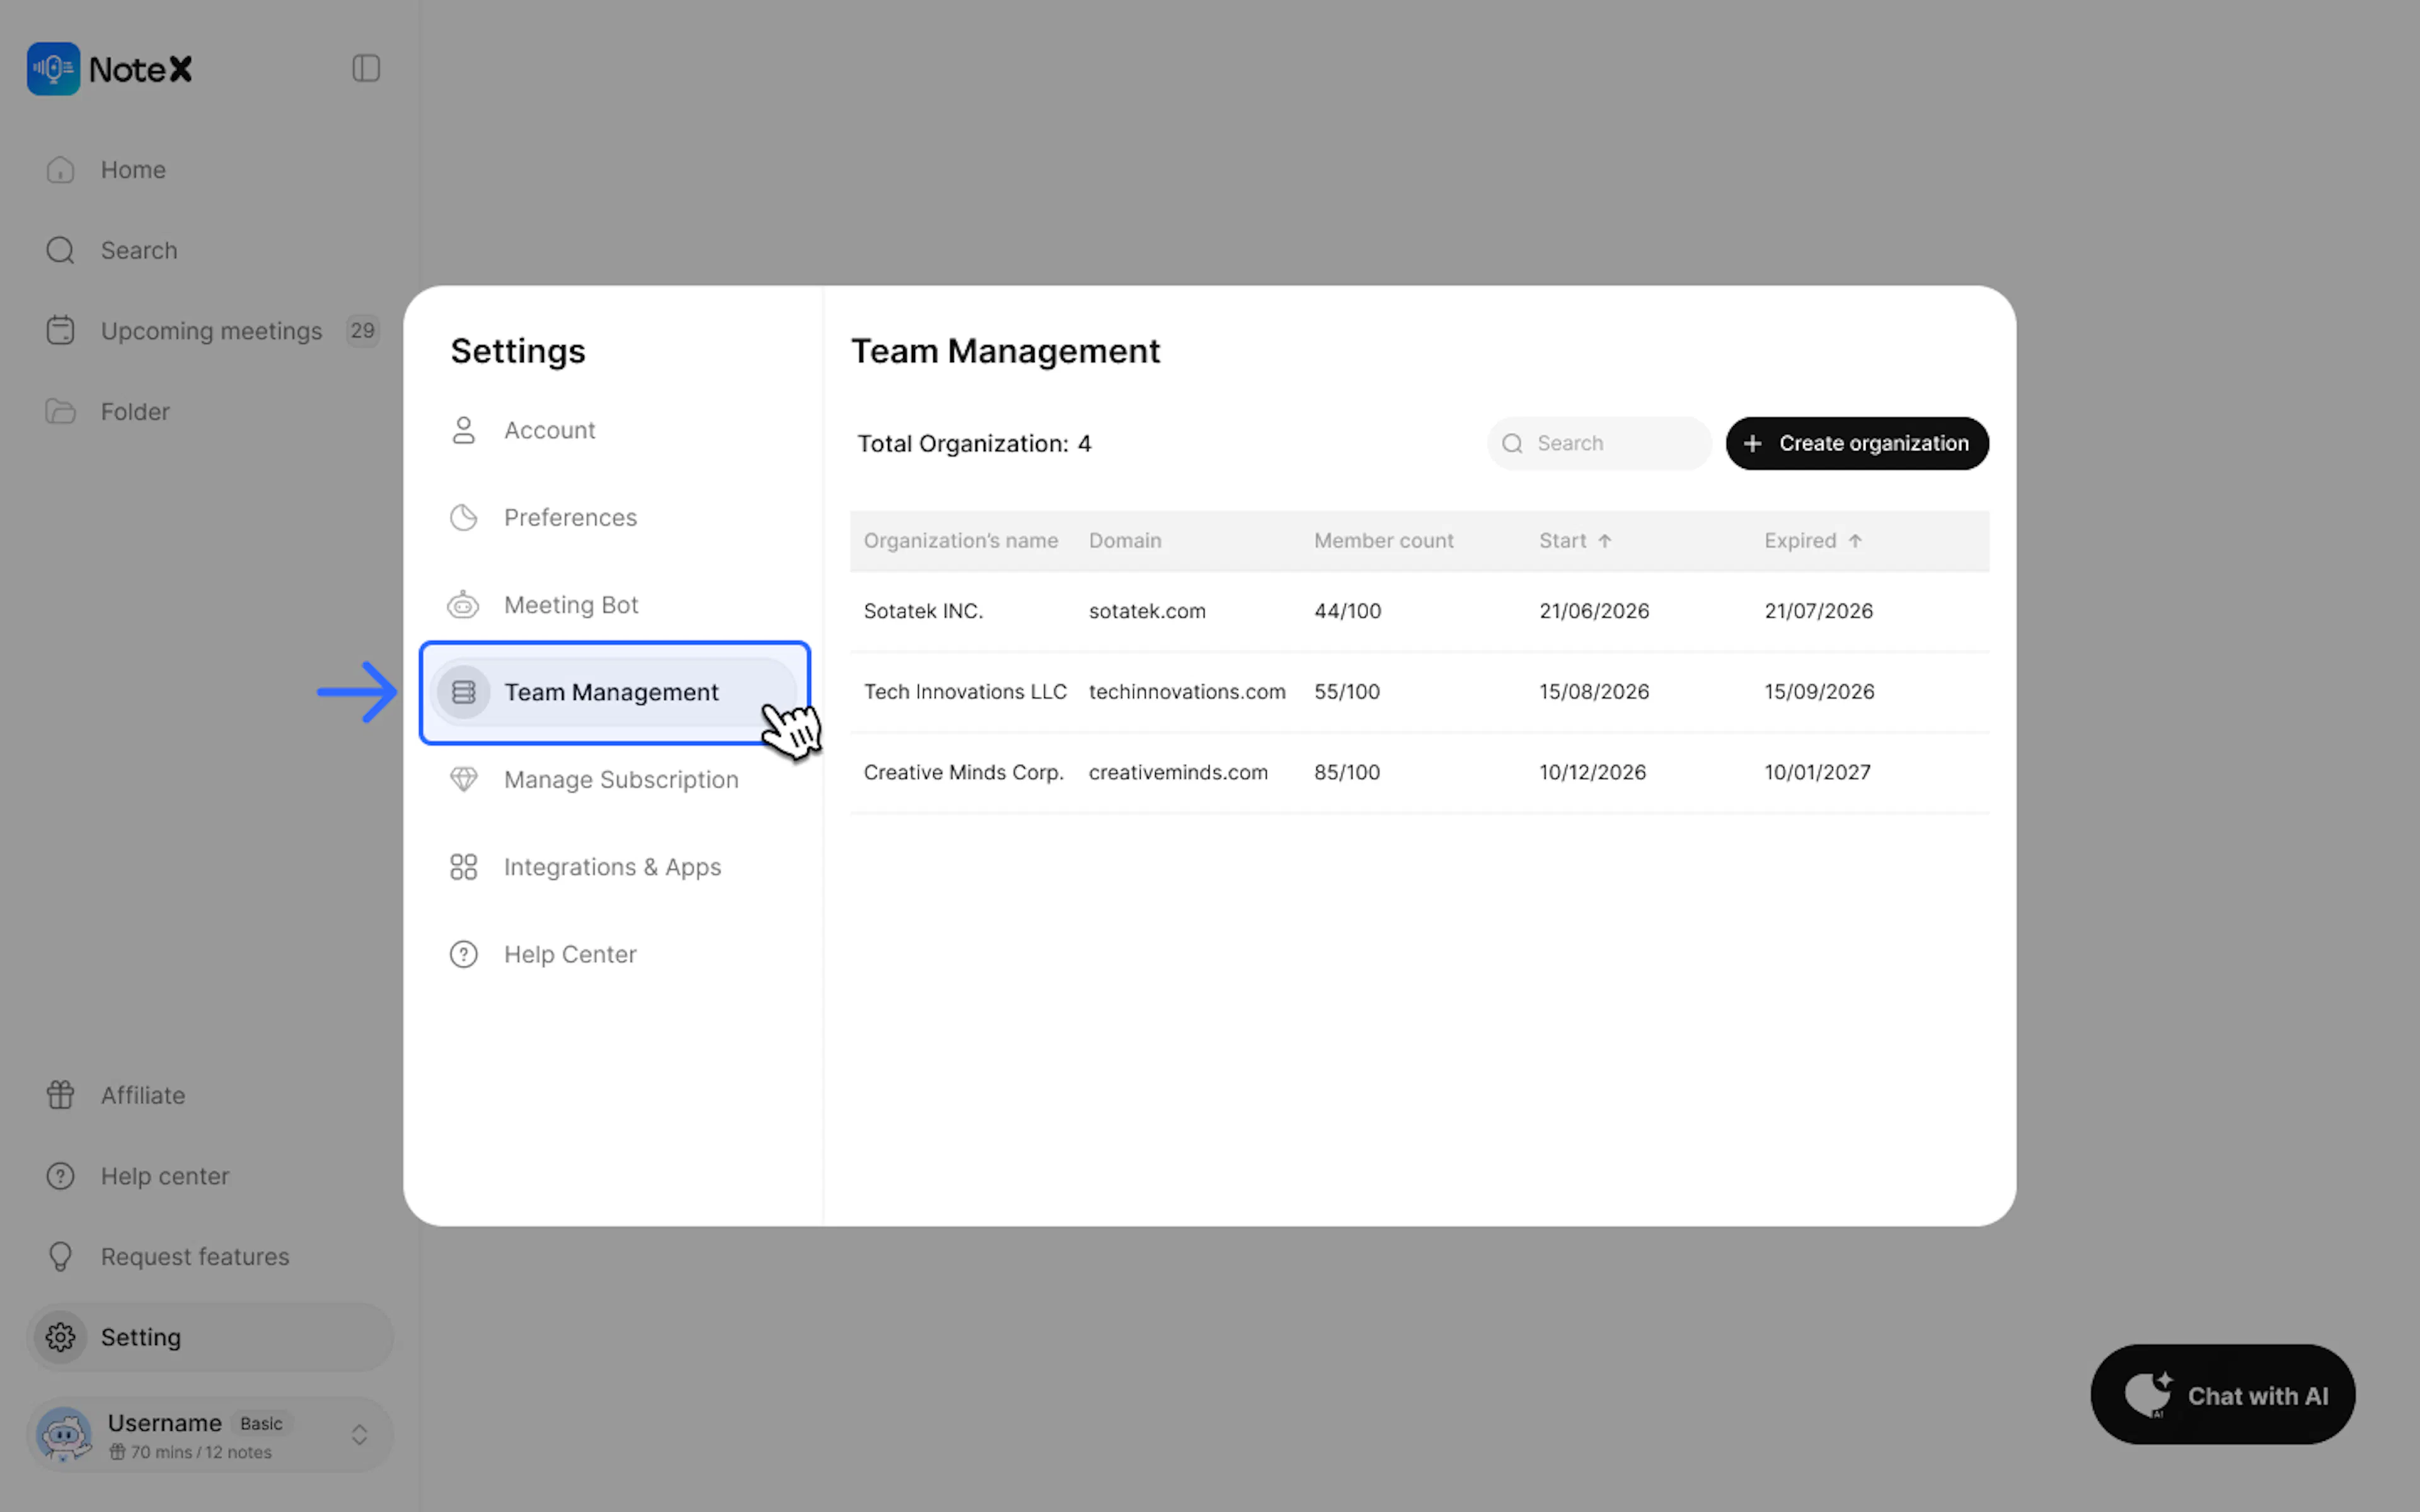
Here, you will see the current total number of members (e.g., 8/15) and a detailed list of members, including: Email, Status, and Role.
2. Invite New Members
To add new users to your team:
-
Click the + Add members button at the top of the list.
-
A window will appear; you need to enter the following information:
-
Email: Enter the email address of the person you want to invite (the system suggests company email domains like @company.com).
-
Role: Choose a role for the new member (default is Member).
-
-
Click Add to send the invitation.
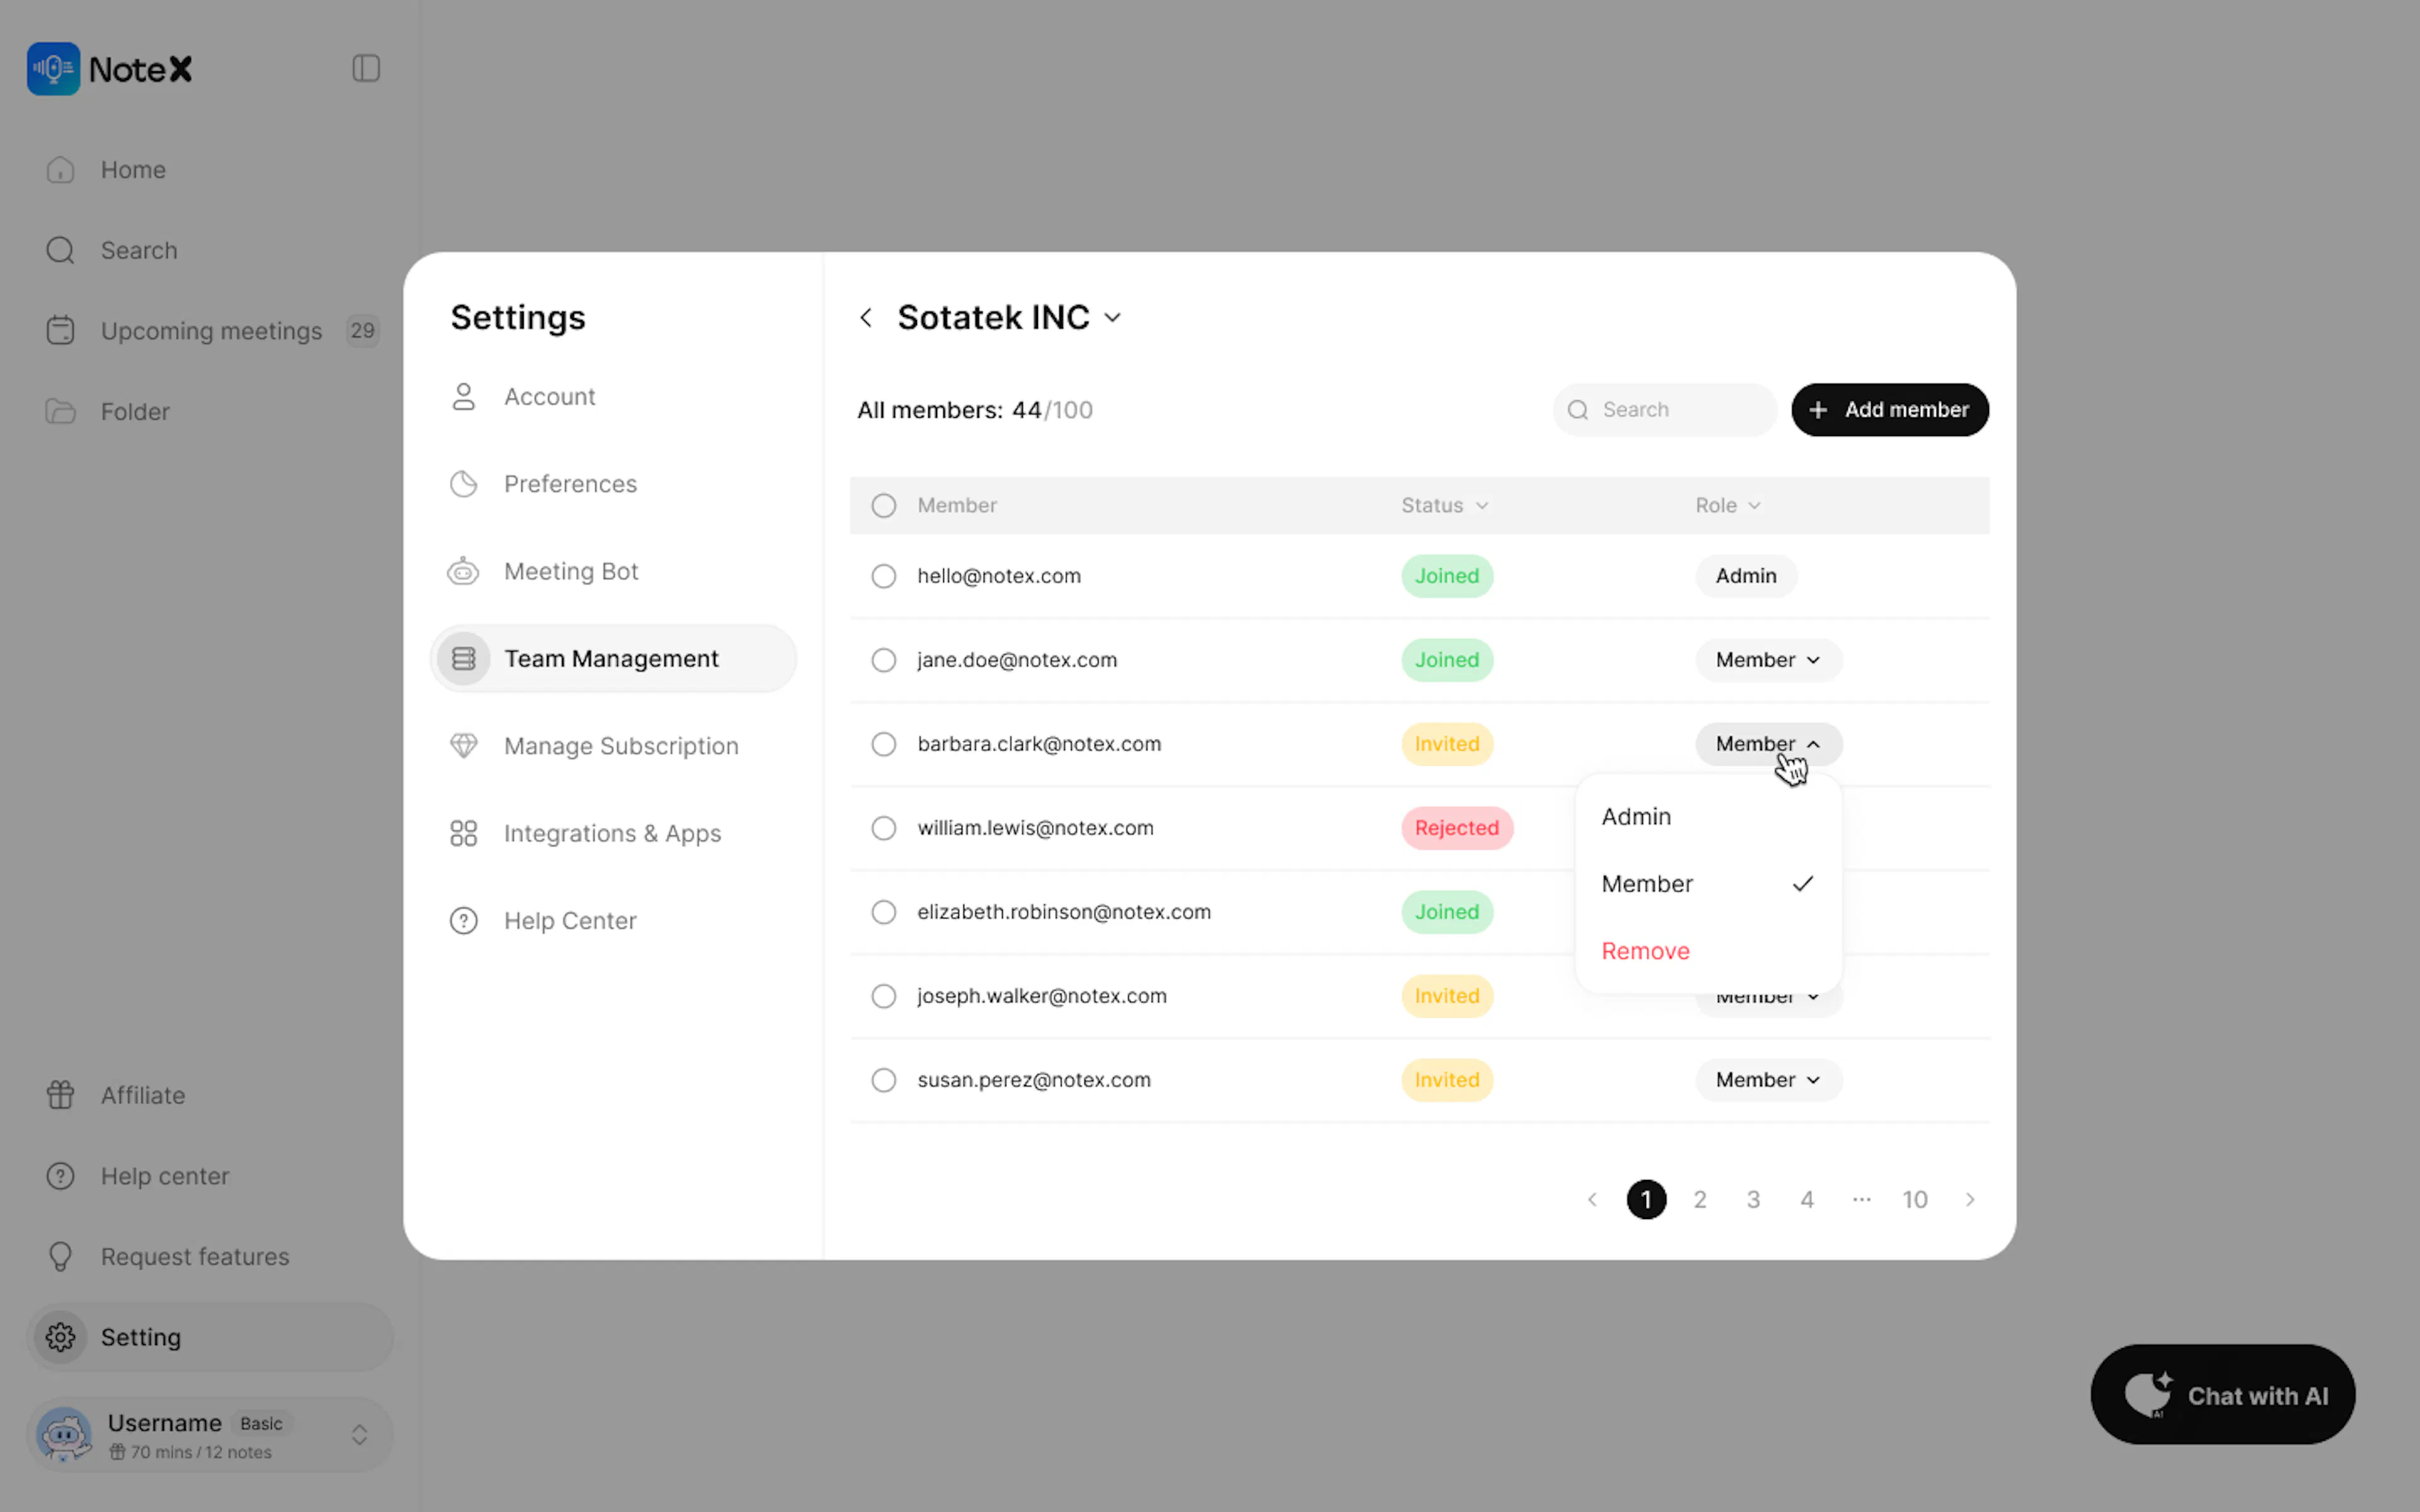
3. Permissions and Roles (Roles)
The system currently supports two main roles:
-
Admin (Administrator): Has full permissions to manage members, including inviting new members, editing roles, and deleting members.
-
Member: Has access to shared team resources but does not have permission to manage personnel.
To change the role of an existing member in the list, click on that member's role in the Role column.
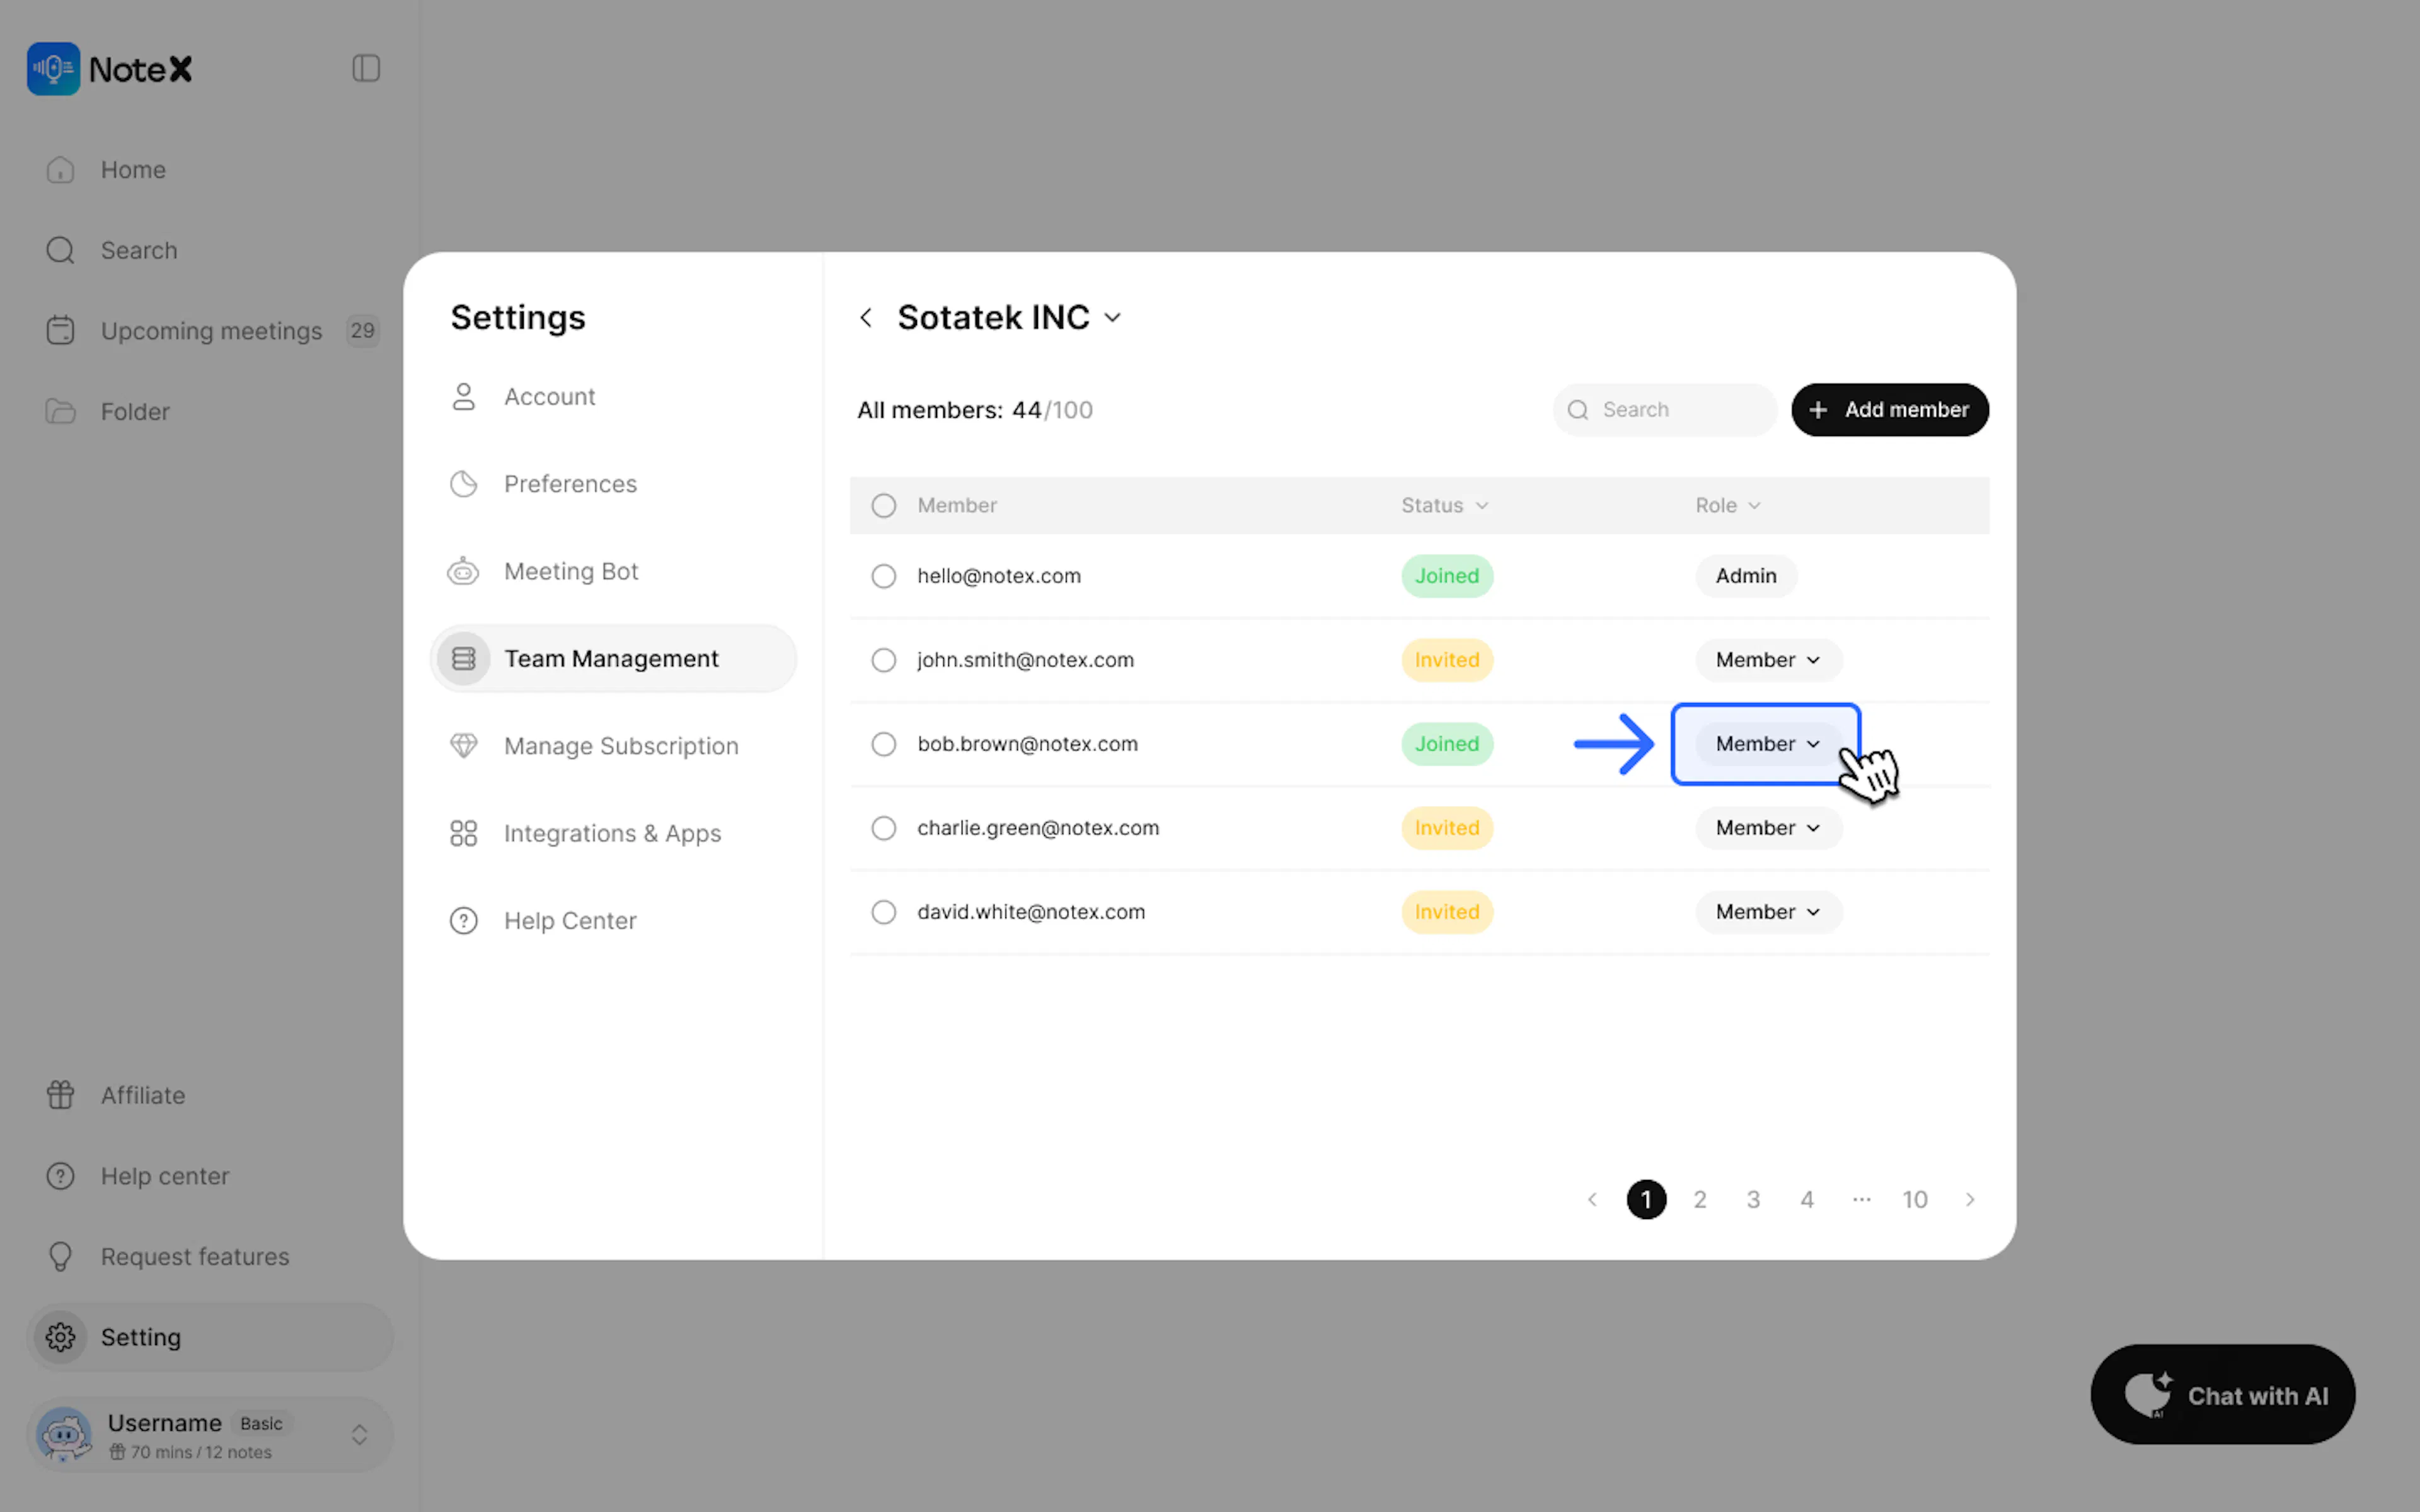
4. Managing the Member List
-
Search: Use the Search bar in the top right corner to quickly find a member by email.
-
Status:
-
Joined: The member has activated their account and has access.
-
Invited: The invitation has been sent but the user has not confirmed yet.
-
-
Delete member: To remove someone from the team, click the Trash bin icon. The system will ask for confirmation before deletion.
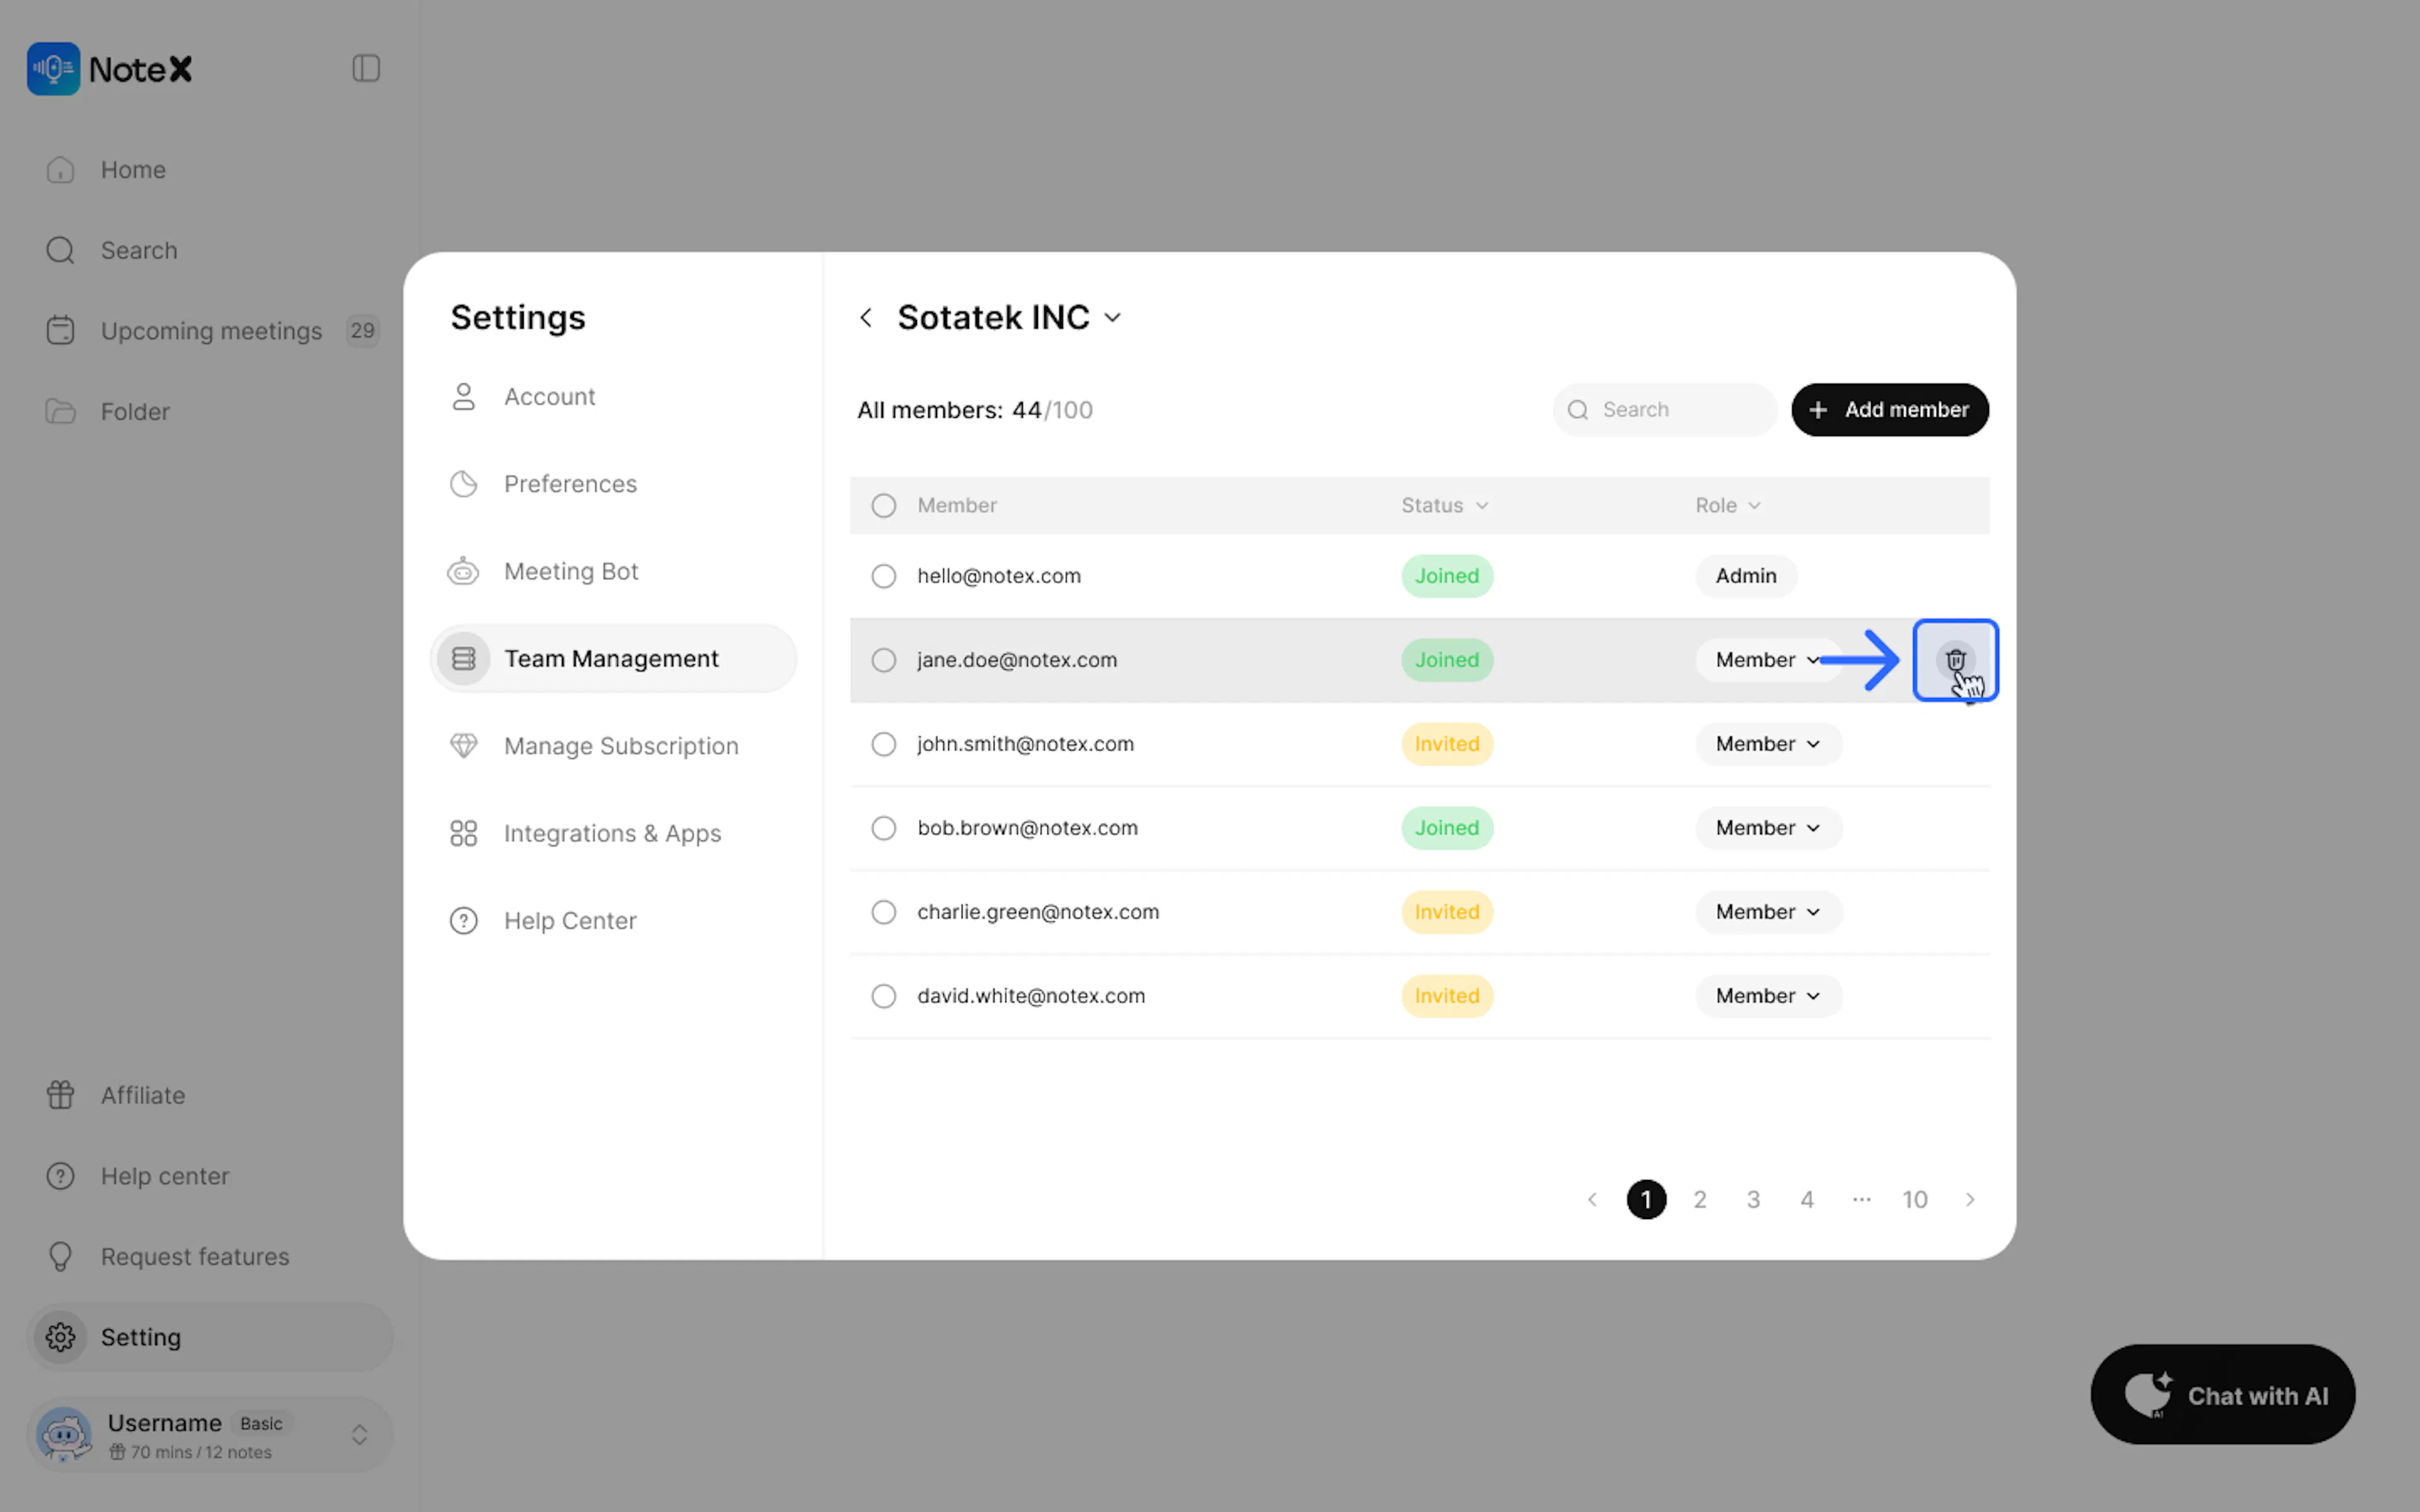
Note: Please pay attention to the member limit (Total members) of your current subscription plan to ensure you have enough vacant slots before sending new invitations.
5. Frequently Asked Questions (FAQ)
Q: Does the recipient of the link need to register for a NoteX account to view it?
- A: No. Once you turn on Public mode, anyone with the link (and password, if applicable) can view your selected content.
Q: If I delete a Folder, will the notes inside be lost?
- A: No. The notes will return to the "All Notes" (General Notes) section, preventing you from losing important data.
Q: How do I know which notes are currently shared publicly?
- A: On the note list or within the note details, you will see a Public (Green) or Private (Gray) status to easily keep track.
6. Technical Support
If you encounter any difficulties during this process, please contact us via:
-
Email Support: Hello@notex.app
-
Support Community: Discord Community